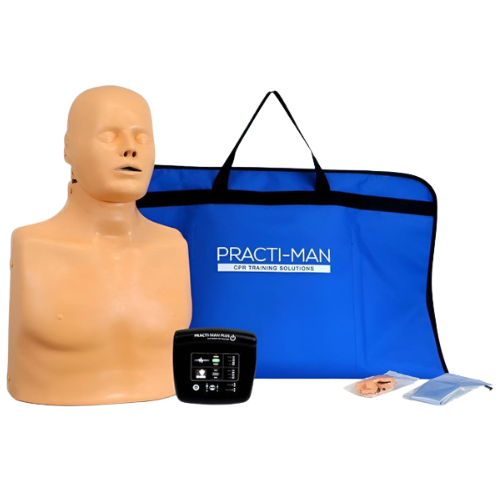
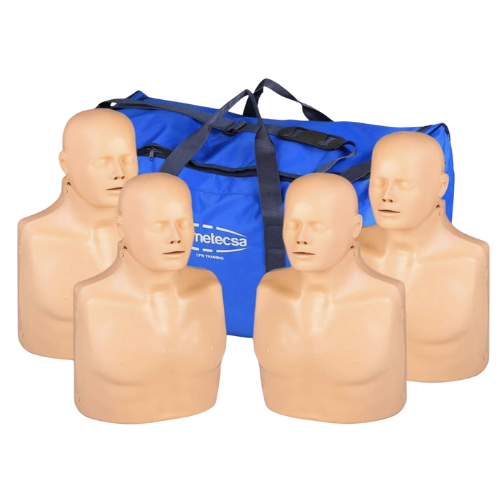
Realistic CPR Manikin Practice for First Aid Response
Every minute counts in an emergency, but when someone collapses and stops breathing, even the best-intentioned bystanders can freeze. Training is supposed to get us ready for these moments.
Yet, time after time, real incidents reveal a harsh truth: many staff remember the theory from their first aid course, but falter when it’s time for action. Reading about CPR isn’t enough. It’s the hands-on practice that builds skill and steady hands. Knowing how hard to push, the right position, and feeling the “give” of a chest are things you can’t get from a slide show.
In workplaces, especially those covered by UK health and safety law, this gap between knowledge and practice creates serious risks. First aiders who have only ‘talked through’ CPR may not act quickly enough, or worse, may injure the casualty with incorrect technique. That leads to both poor outcomes in the event itself and additional legal headache for employers who didn’t provide adequate, real-world training. Lives, reputation, morale, insurance cover, and regulatory compliance are all at risk.
Manikins, when used properly, allow first aiders to rehearse the actual motions, correct their form under an instructor’s eye, and repeat until the movements become second nature. This creates a safe environment for mistakes and improvement before it really counts.
Common Pitfalls
Despite clear guidance from bodies like the Health and Safety Executive (HSE) and Resuscitation Council UK, faults crop up again and again with manikin use:
Under-using Manikins: Training still relies too heavily on theory, leaving staff with hardly any “on-chest” practice. Some companies skip practice altogether to save time or avoid the “fuss” of setting up manikins.
Poor Maintenance: Manikins get battered after hundreds of chest compressions. Parts loosen, the chest springs wear out, and feedback becomes unreliable. Training on a tired, damaged manikin builds bad habits.
Inadequate Cleaning: In rush periods or large training sessions, basic cleaning steps are skipped, leading to hygiene issues and even illness outbreaks. Some teams are unsure which products are safe to use and end up damaging the equipment.
Ignoring Manufacturer Instructions: People get creative with repairs or cleaning because they lose the manual or don’t think it matters. Improper fixes end up as more expensive repairs down the line.
Budget Cuts Leading to Cheap Models: To save money, teams sometimes buy basic trainers with poor feedback, or squeeze too many learners onto a single manikin, which reduces hands-on time for everyone.
All these add up to ineffective, sometimes even unsafe, CPR training. No workplace should accept that outcome.
Step-by-Step Fix
A quality CPR training setup means more than ticking boxes. The steps below help you deliver sessions that truly prepare your team and avoid problems later.
Step 1. Check and prepare your manikins before every session
Unexpected issues crop up with manikins all the time, such as collapsed springs, missing lungs, loose skin, or electronic feedback units that don’t beep. Make it a habit to inspect each unit before the trainees even walk in.
What to look for:
Cracks or splits on the chest plate
Loose or damaged arms/joints (especially on infant or child models)
Airway blockages or missing mouth pieces/breathing bags
Battery charge and function in electronic units
Clean, intact faces and no smell (a sign of poor cleaning or storage)
Any previous “quick fixes” coming loose
Replace worn parts straight away, or have backup kits ready. Don’t try to get by with substandard equipment—this often leads to further issues.
DefibSpace Tip
Keep an easy-to-read maintenance log next to your training kit. Jot down quick notes after every session: ‘Chest spring feels softer’, ‘Lung bag split’, ‘Unit cleaned with wipes’. This history avoids surprises before important training and helps plan what replacements to order well in advance.
Step 2. Clean manikins thoroughly and safely after every use
Hygiene matters. Every mouthpiece, face skin, and airway part must be cleaned—or swapped—for each learner. Beyond basic decency, this is now a regulatory expectation in most sectors, especially in the NHS, care, and hospitality.
Practical steps:
Start with hand washing for all participants before and after training.
Remove and replace or disinfect individual face masks or pieces. Some models allow for each trainee to have their own mask.
Use cleaning wipes or sprays approved by the manufacturer. Milton Solution (diluted as per instructions) or Clinell Universal Wipes are common choices. Bleach or abrasive sprays can degrade plastics and rubbers.
If in doubt, always refer to the manikin’s manual. Most major brands like Laerdal and Brayden provide quick-start cleaning sheets you can print and hang in your training space.
Allow all parts to dry completely before reassembling or bagging away.
DefibSpace Tip
Set up a cleaning station at your venue entrance, with wipes, spare face skins/masks, and bins. Give each trainee their own mask or piece, collect after use, and clean on the spot. This keeps the flow going, maintains standards, and saves your team scrambling at the end of every session.
Step 3. Rotate and replace key parts to extend lifespan
Manikins are built for hard work, but nothing lasts forever. Chest plates, springs, and internal “lungs” become less responsive after repeated compressions. You may notice that compressions get easier or there’s less “pop” feedback over time. This signals it’s time to rotate or replace parts.
Suggested intervals:
Chest springs: Inspect monthly during frequent use and replace when compressions feel too soft or the recoil is slow.
Airway bags/lungs: Replace after every training block (this may mean every one to three months) or immediately if visibly damaged.
Face skins/mouthpieces: Disinfect after each participant or use disposable covers. Swap fully every few months, depending on usage.
Electronics/batteries: Recharge after every session. Replace spent batteries and failing speakers promptly—don’t rely on weak sound for feedback.
DefibSpace Tip
Mark the date of last replacement on each part with a sharpie, or keep a replacement calendar as part of your kit log. This quick check prevents “training drift” where feedback gradually worsens and nobody notices until skills have slipped.
Step 4. Review feedback and adapt training for better realism
Modern CPR manikins offer more than a plastic chest. Many now include lights, clickers, screens, and app connectivity. While extra features can help, what matters is that learners get meaningful feedback. Are they compressing deep enough? Too fast, or too slow? Are their hands in the right place?
Best practice:
Pair each trainee (or pair per manikin) with a trained instructor who watches and corrects technique.
Use manikins that give at least audible “click” or visual cues to show correct compression depth.
Practice with a mix of adult, child, and baby models if your setting requires it.
If budget is tight, supplement one feedback manikin with several basic ones. Rotate through stations to give everyone hands-on time with proper feedback.
For remote or blended learning, look for manikins compatible with online feedback platforms.
DefibSpace Tip
After each course, ask trainees for anonymous feedback about the manikins and the session. Spot patterns—did people say it was “too easy/hard”, or “felt unreal”? Make adjustments early, before bad habits form or confidence is lost.
Step 5. Store manikins properly
Between courses, correct storage will decide if your manikins are ready for next time or if you’ll be chasing replacements at the last minute.
Checklist:
Store manikins in a clean, dry, locked cupboard or room away from sunlight and heat sources.
Avoid piling weights or extra kit on top, which damages chest plates and internal springs.
Keep all small parts together in a labelled case: face skins, lungs, masks, screws, and batteries.
For manikins with electronics, remove batteries if not used for extended periods to avoid leakage.
Schedule regular deep cleans to catch any issues before they escalate.
DefibSpace Tip
Attach a simple instruction sheet inside your storage cupboard: “Before use / After use / Cleaning / Common Problems / Who to Contact.” Staff turnover won’t always guarantee kit knowledge—a cheat sheet keeps standards high.
What Most People Miss
Organisations often focus only on “getting through the course” and miss out on the greatest learning gains. The real value of manikins comes from building muscle memory and lasting confidence. Gaining hands-on experience—knowing how deep is “deep enough” or what chest recoil should feel like—transforms theory into practical skill.
Failing manikins can quietly erode standards. For example, if the chest is too loose and compressions are too shallow, even minor faults like this, multiplied across sessions, mean entire teams could unknowingly practise incorrect CPR for months. Proper maintenance is directly linked to real-world lifesaving performance.
Workplaces that schedule short, regular refreshers with manikins—even between the standard 3-year first aid renewal—show much higher rates of correct, “automatic” response in real emergencies.
The Bigger Picture
Investing time and care into your CPR manikins pays off over the long term. Well-maintained, realistic manikins support better training and sharper skills year after year. That leads to:
Faster, more confident, and more correct responses in an actual cardiac arrest
Fewer injuries from poor compression technique or incorrect ventilation
Hassle-free audits from the HSE or insurers, with fully compliant records to show
Lower long-term equipment costs through scheduled spares and preventative care
Increased morale and safety culture, as staff know they’ll get quality practice, not just theory
Effective CPR practice closes the gap between training and real incidents. When the alarm sounds, your team won’t hesitate—they’ll know from experience exactly what to do.
Wrap-Up
Effective CPR training protects lives and gives your people real confidence to act. By prioritising manikin care, cleaning, and realistic practice, every CPR refresher becomes a session that builds useful skills.
Key takeaways
Use your manikins for every session—don’t skimp on hands-on practice.
Stick to a regular checking and maintenance routine; fix small issues straight away.
Clean after every learner with the correct products and processes.
Replace well-worn parts proactively to prevent skill “drift.”
Store your kit safely and provide clear guides for all users.
Looking for reliable training tools? Browse our trusted CPR Training Manikin collection of HSE-recommended equipment.


